The stove obeys again — for 55 instead of 299 euros
The pellet stove accepts heat level and target temperature again. It took a 32-euro converter, the right baud rate, and one line of code in the right place.
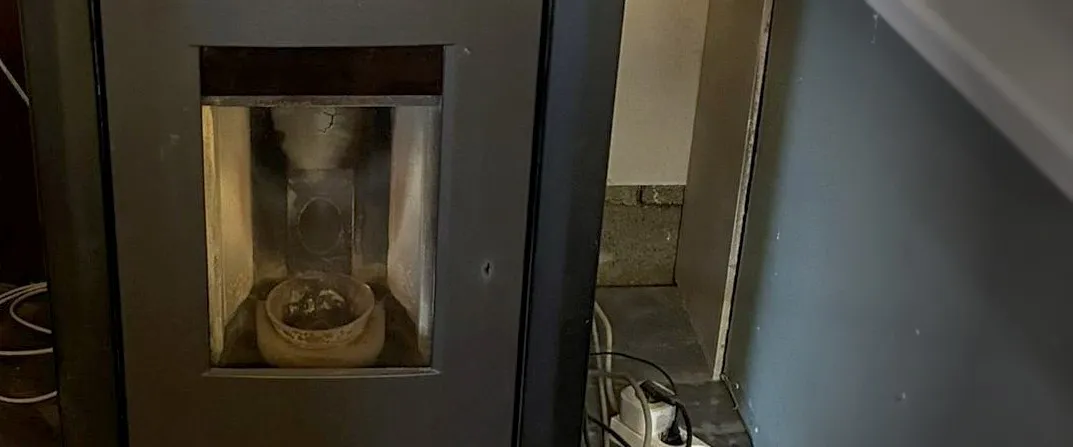
Bruno has one clear favourite spot in Kapfenberg: in front of the pellet stove. What that stove had not been able to do for years, it can do again since 3 October — it accepts heat level and target temperature from Home Assistant, not just on and off.
The starting question was simple: there used to be a GSM controller on the stove that could do more than switch it. It is gone. Can that be brought back?
Yes. Both of it. And for roughly 55 euros instead of the 299 the ready-made module costs. Here is how — and where I got it badly wrong twice along the way.
Why a relay is not enough
There was already a relay on the stove’s thermostat contact. It has exactly two states: open and closed. Heat demand yes or no.
That is where most guides stop — and it is not enough. If you want to set the output level or regulate to a room temperature, you need a different route.
One warning up front, because it keeps coming up: “switching off” a burning pellet stove at the socket is not automation, it is damage with advance notice. It cuts the fan’s run-on phase. The thermostat contact is the right way for this; the socket never is.
The socket the old controller hung on
There is a 15-pin Sub-D socket on the back. The old GSM module hung there, and today’s retrofit solutions use the same socket.
The proof that more than on/off is possible there was the history itself: a box that could set heat level and target temperature cannot have been wired to the thermostat contact.
The pinout:
| Pin | Function |
|---|---|
| 1 | 5 V supply |
| 2 | Rx — the stove’s input |
| 3 | Tx — the stove’s output |
| 4 | TTL line for the room sensor |
| 5, 15 | Ground |
Pins 2 and 3 are real RS-232. Pin 4 is something else, namely the TTL line of the temperature sensor. That distinction sounds like trivia and cost me half a day — more on that below.
The surprise: the stove is looking for a modem
On this socket the stove behaves like a PC expecting a GSM modem. It polls the SMS store with an AT command every five and a half seconds. If it gets no answer, it keeps asking. If the answer stays away for half a minute, it switches the GSM mode off — and only a human at the keypad display brings that back.
So anyone who wants to use this interface emulates a modem. Commands then
arrive as invented text messages, in the form [code] [command] [parameter] — for
instance ON, h100 for full output, or r21 for 21 degrees room temperature.
The parts
| Part | Exact designation | Purpose | Price |
|---|---|---|---|
| DB15 cable | Harrisen DB15, pre-made — red, brown and light green go to pins 3, 2 and 15 | to the stove socket | ~€20 |
| Serial converter | USR-DR162, serial to Wi-Fi, with screw terminals | puts the interface on the network | €31.94 |
| 12 V power supply | — | feeds the converter | ~€8 |
| Room sensor | — | left over from the old kit | — |
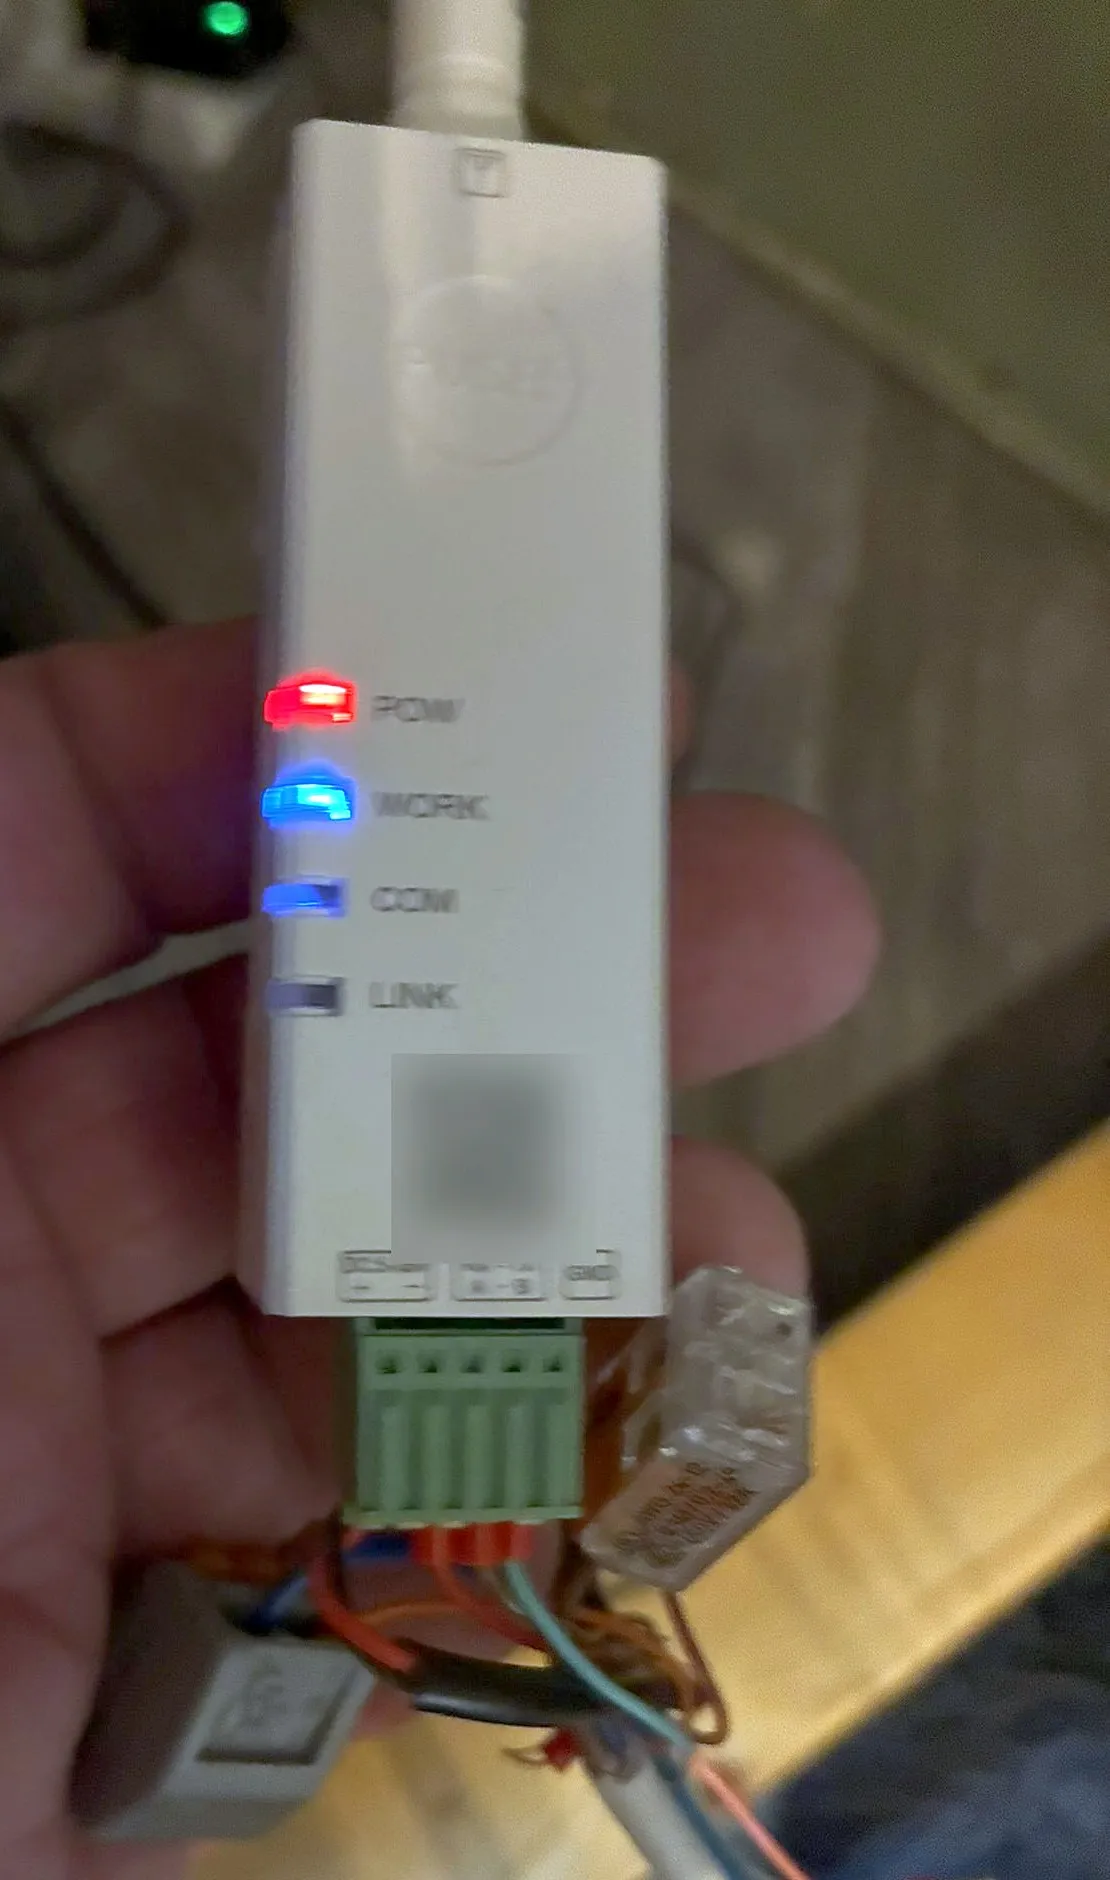
This is the 32-euro part. The four lights say, in order: power present, device running, data passing, Wi-Fi up. That order was useful while hunting the fault — the identifier on the sticker has been obscured.
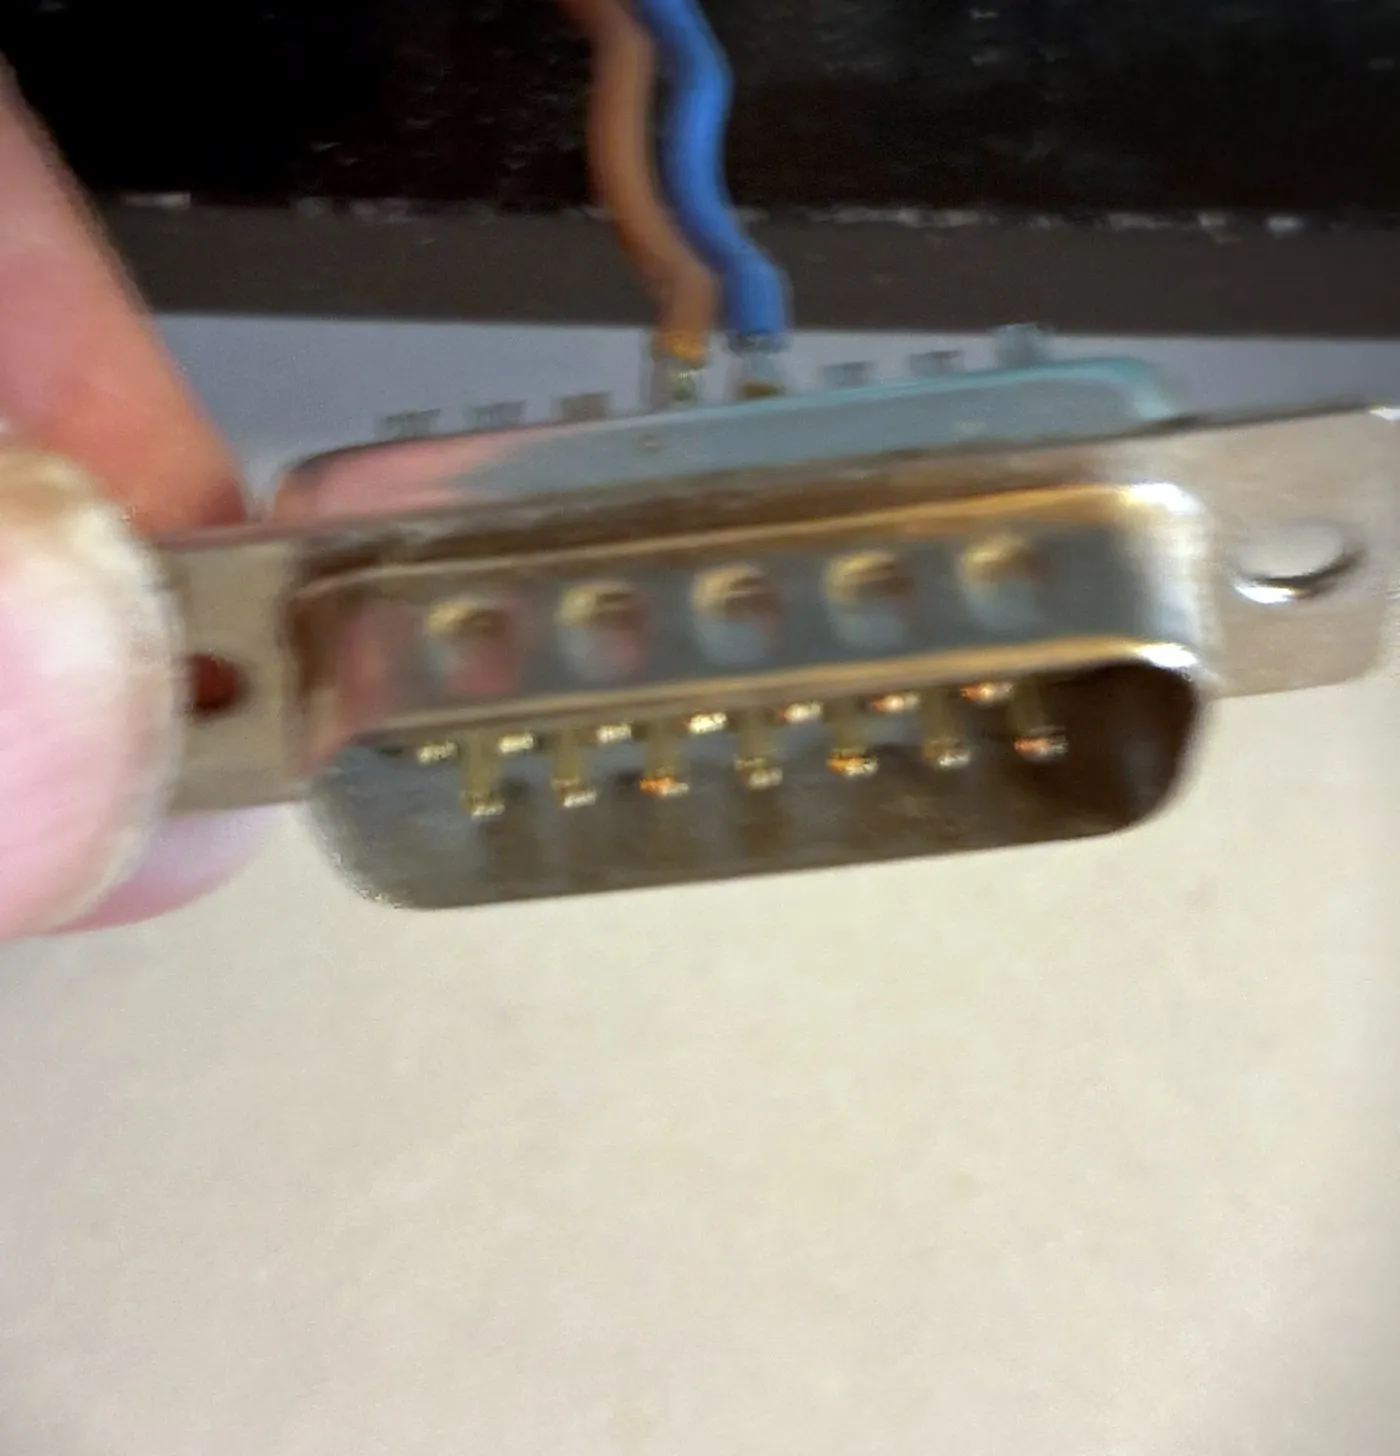
Three of fifteen pins are used. The other twelve belong to the socket’s older pinout and stay empty — working out which three was half the soldering job.
Not needed, although planned at first: an ESP32 and a level shifter. The worries about signal levels were unfounded — pins 2 and 3 are genuine RS-232.
For comparison: the ready-made retrofit module costs 299 euros and does the same thing. It was a serious alternative, and the decision only came once it was clear the self-built route would hold. Around €55 against €299 — for a program of 200 lines.
The pinout is not mine. It comes from a forum post from 2013 in which somebody had already measured the same socket. Without it the project would have started with a continuity tester.
The converter’s form factor is worth a look. The screw-terminal variant saves the DB9 cable and a gender changer; dual-band helps in a house whose 2.4 GHz band is already occupied by a dozen cameras.
The day nothing came through
First measuring day: cable attached, converter on the network, capture program running — and silence. Every five and a half seconds a handful of meaningless bytes whose count shifted with the sampling rate.
What I made of that is the instructive part.
Mistake 1: I read a pattern into noise
On one of the wires, three bytes arrived with a fixed first value and a varying remainder. That looked like structure. I concluded I had found the right wire.
It was the same artefact as everywhere else, just on a different pin. Reading a message into a pattern in noise is the classic error — and the control test that would have disproved it was already running at the time.
Mistake 2: An assumption I no longer saw as one
Then I found a sentence in someone else’s project saying the stove uses 5 volt logic on the serial connection. From that I constructed a hardware fault: the socket carries TTL, the converter I had bought was the wrong device, an ESP32 was needed.
That was wrong, and the objection came promptly: TTL applies to the temperature sensor, not to the serial connection. Exactly right — pin 4 is TTL, pins 2 and 3 are RS-232.
The root of the error: I never checked whether the socket carries RS-232 at all, because the original modem has “RS232” in its name. An assumption that sits so deep you stop seeing it as one costs a measuring day.
It was the baud rate
13:28:50.493  ATE0<CR>
13:28:56.035  ATE0<CR>
13:29:01.576  ATE0<CR>
ATE0 is the first command sent to a modem: echo off. The stove repeated it every
five and a half seconds because no OK ever came back.
The setting that works: 38400, 8N1. Other documentation lists 115200 for different models — and 38400 was the one rate I had never tried.
Two hours on a single line
The stove was talking but would not accept a command. Every attempt returned
FAILURE: code Error. That reads like “wrong access code”, and that is exactly
the direction I searched in for two hours: reset the code, shortened the sender
number, varied spacing in the header, swapped line endings, inserted pauses.
Nine suspects, all ruled out.
The cause was one line in my port of the reference project: I discarded the
waiting message after delivering it once. The original keeps it ready and delivers
it again on every poll until the stove explicitly deletes it. My stove therefore
only read it partially — and code Error was never a statement about the code, but
about a half-read message.
What found it was not the next idea, but a change of tool. Instead of a one-minute run per attempt, a batch run delivered eight variants in a single pass. That made it obvious that the second message of each pair always got through — and from there it was one step to the fix.
The lesson is not “read the other project’s documentation to the end”. It is: if you are making twelve individual attempts, build the tool that does twelve at once after the third.
16:08 — it burns
14:07:30  queued:   ON
14:07:47  MESSAGE:  STOVE ON - HEAT 60%
14:08:22  queued:   h100
14:08:43  MESSAGE:  STOVE ON - HEAT 100%
The smart plug confirmed it independently of any message: 277 watts instead of 2.5. You can hear the ignition, and the power measurement shows it.
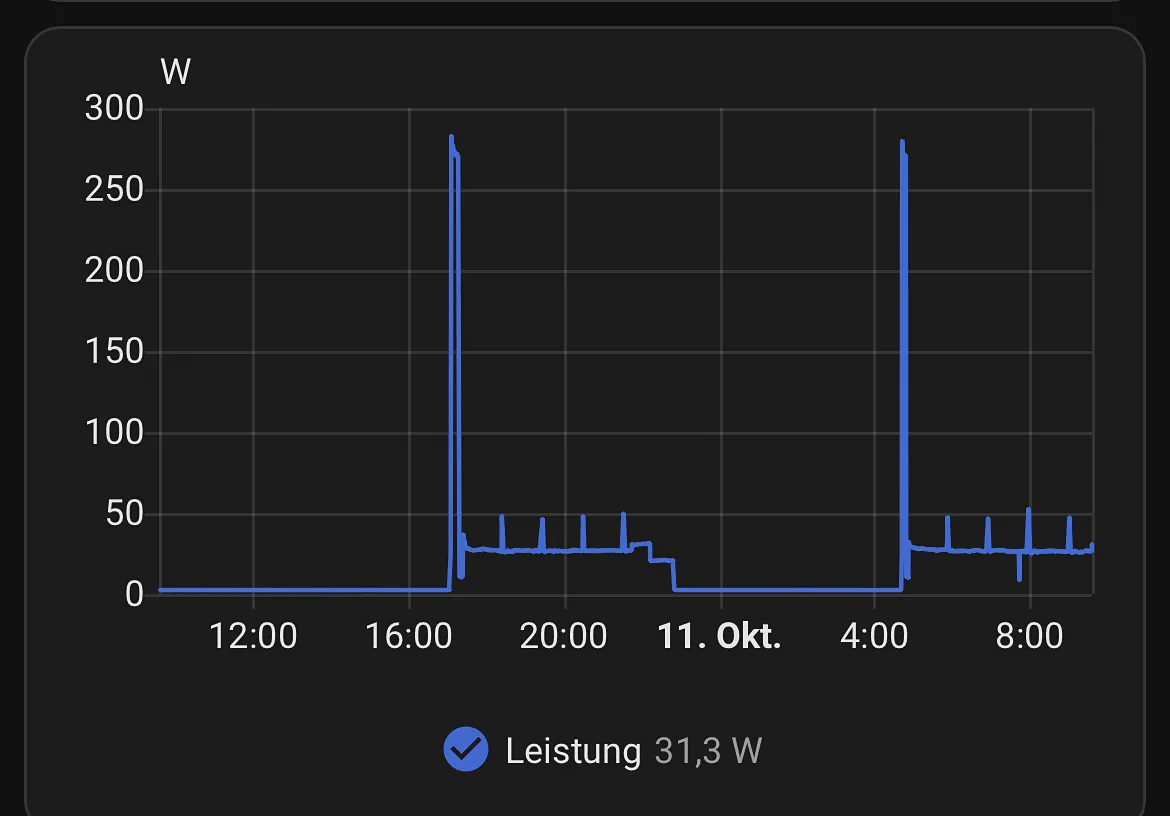
The two needles are the ignitions, the plateau at around 30 watts is normal running. This curve is exactly why there is no sensor here called “burning” — more on that below.
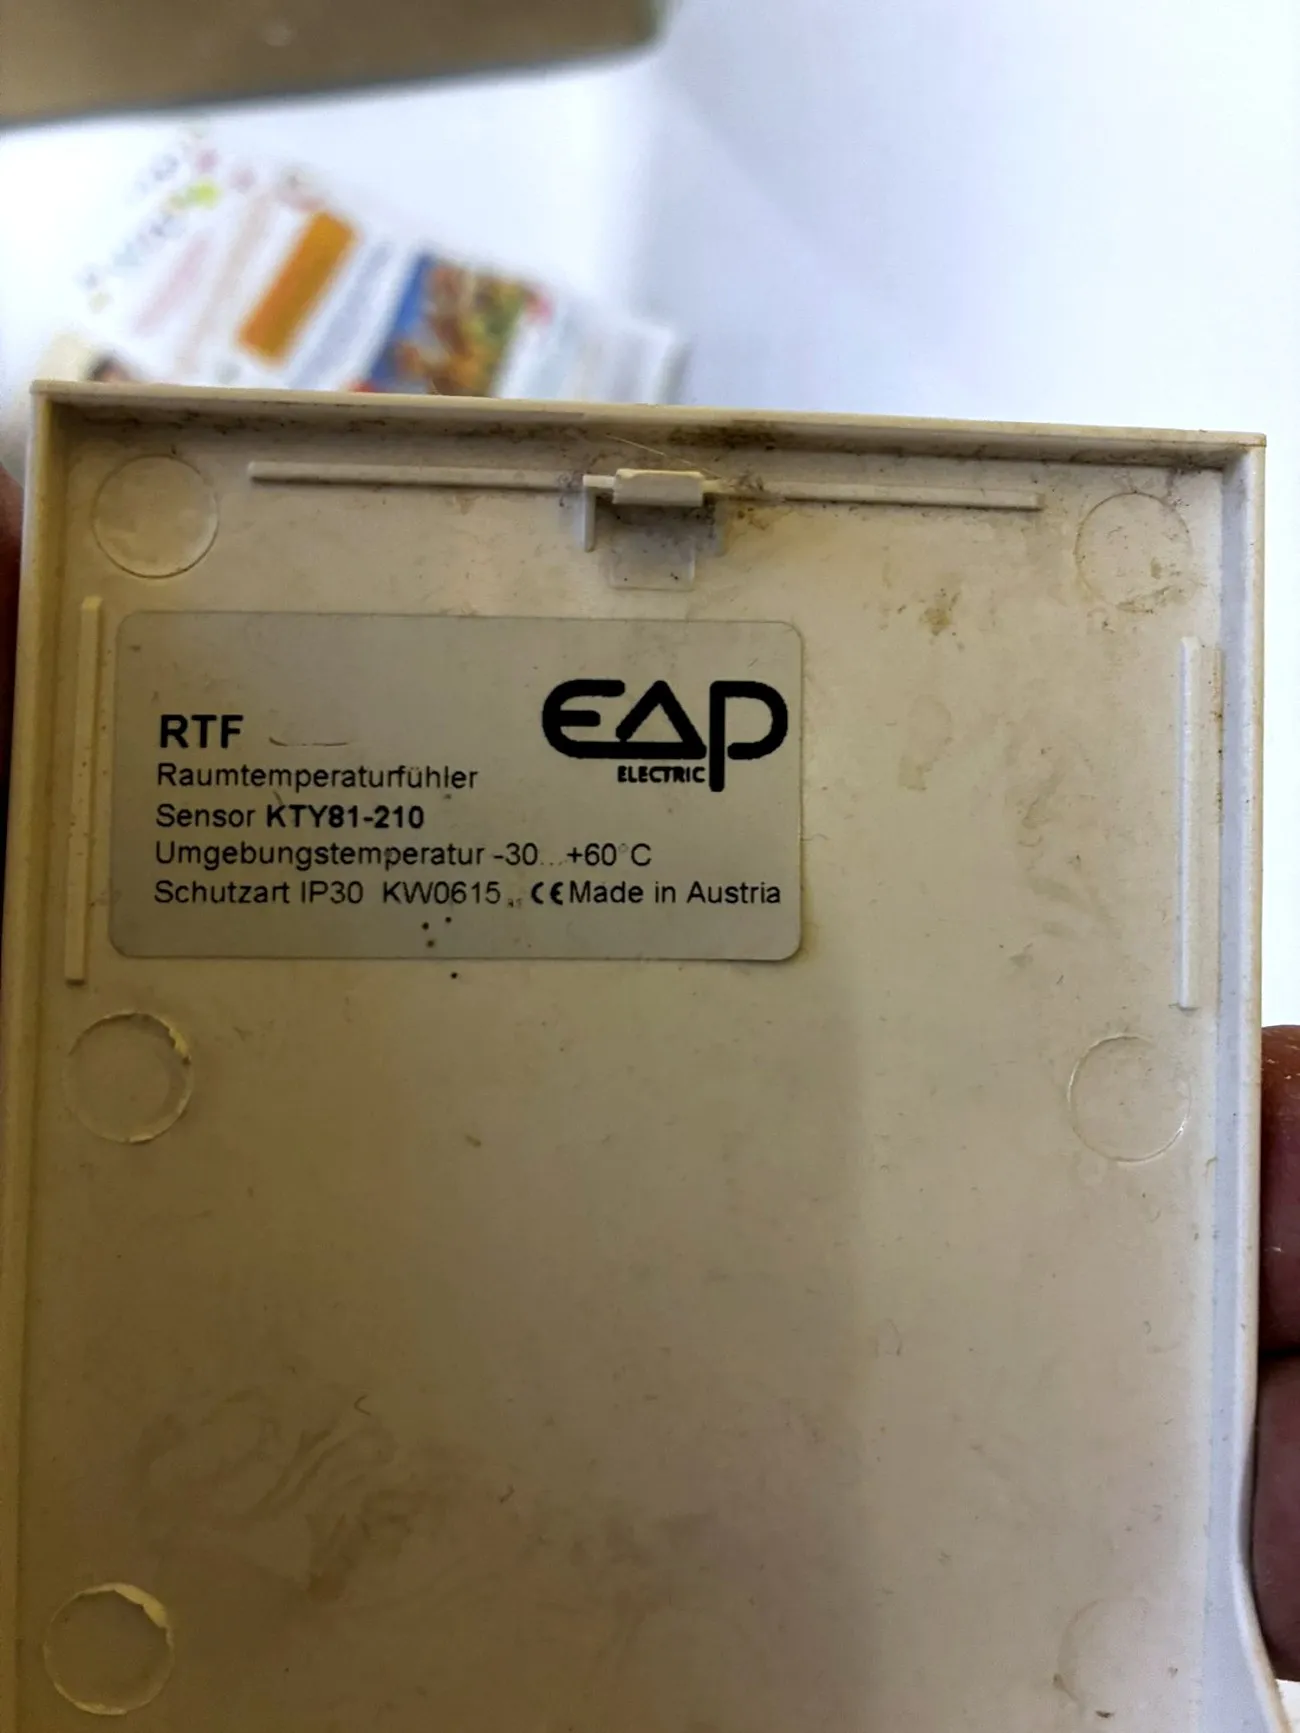
The room sensor was left over from the old equipment. The back says what is inside — a simple resistance sensor, nothing digital.
Later in the same project came the room sensor, wired to pins 4 and 5 of the same socket — a before and after that needs no interpretation:
before:  r21  ->  FAILURE: text Error
after:   r21  ->  STOVE ON - ROOM 21
That answers the original question. Heat level and temperature.
The strangest bug of the project
The stove appended PLEASE SAVE TEL NUMBER to every reply, although the number
was stored. Five explanations, all disproved.
The solution was mundane and had been in the log for hours. What arrived on storing:
sent  "+43..."   ->  stored  "43..."
sent  "0670..."  ->  stored  "670..."
It eats the first character, whichever it is. The remedy is a sacrificial character — prefix the number with an extra plus, and it arrives complete.
Why I did not find this sooner: I asked five times why it would not accept the number, and not once what actually reaches it — even though it reported that in every single reply. The confirmation was there character by character, and I read it as a success message instead of as a measurement.
This is not cosmetic: without a valid number the stove does not send faults on its own — and that is the real prize of the whole integration.
What is in Home Assistant
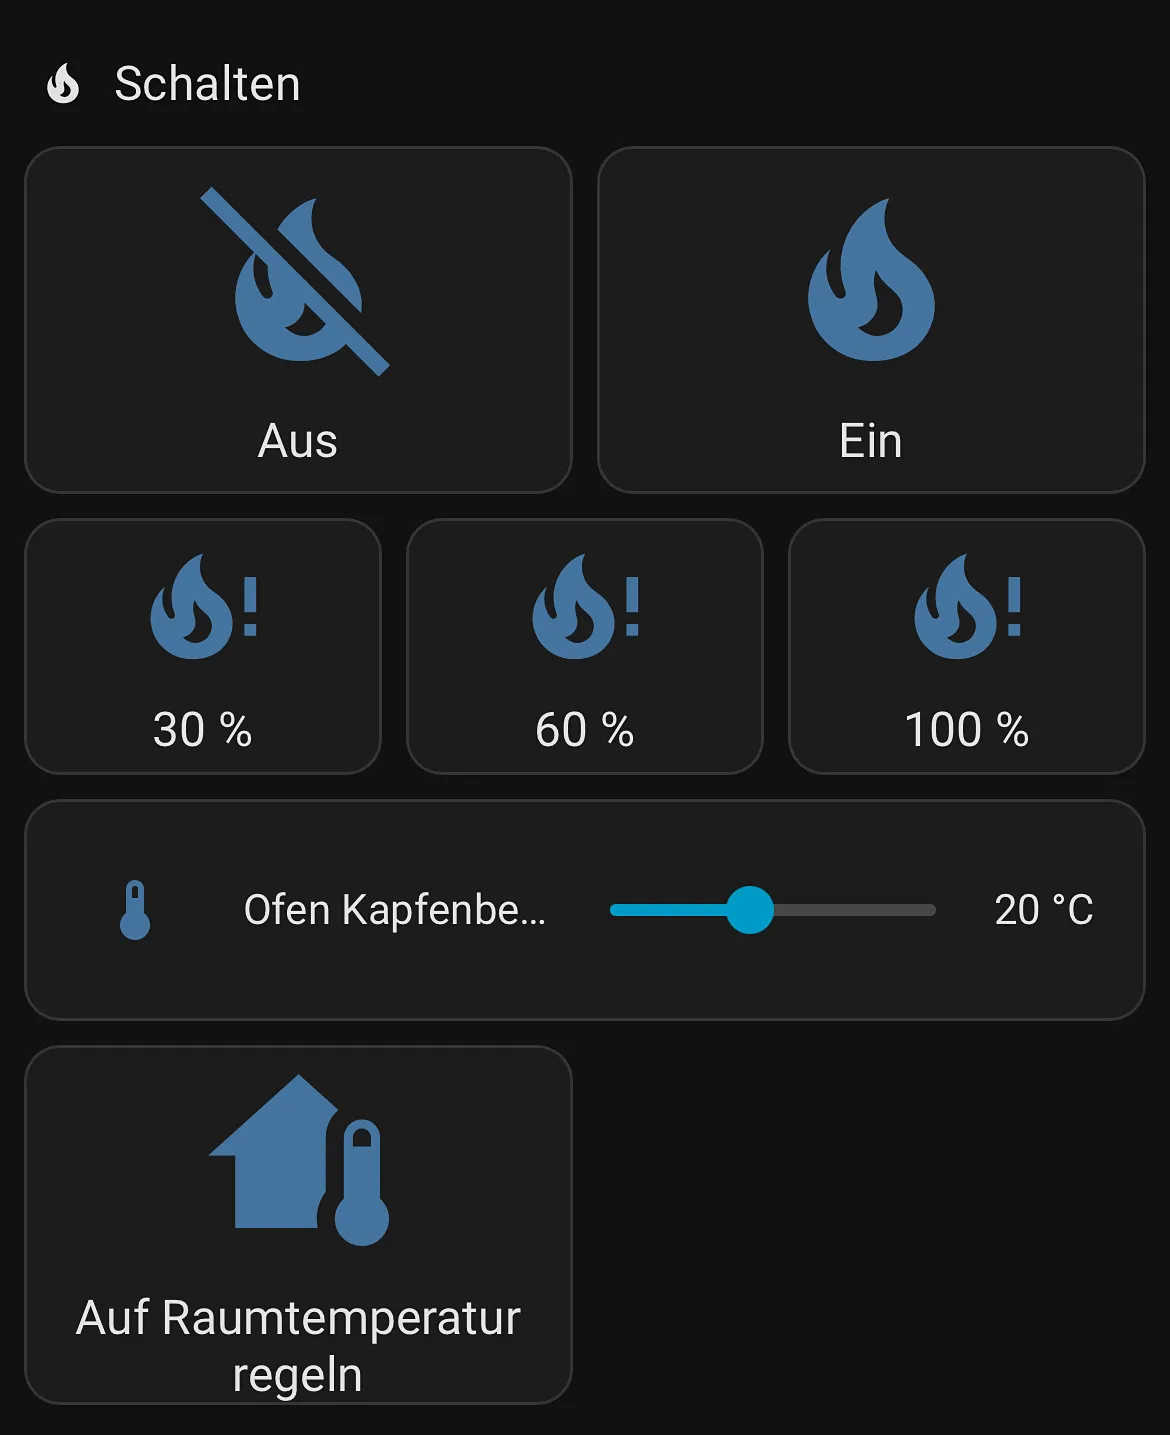
This is what it looks like on the phone. The three steps are the ones the stove accepts over the socket — the protocol offers no more.
| Entity | Meaning |
|---|---|
sensor.ofen_kapfenberg_meldung |
the stove’s last message in plain text |
binary_sensor.ofen_kapfenberg_gsm |
whether the stove sees its modem |
binary_sensor.ofen_kapfenberg_stoerung |
message begins with FAILURE |
rest_command.ofen_kapfenberg_befehl |
issue a command |
script.ofen_kapfenberg_aus |
stove off |
Plus a small service on the Raspberry Pi that holds the permanent connection and answers every poll from the stove. It has to run continuously — not for convenience, but because otherwise the stove switches GSM mode off after half a minute without an answer. During the experiments that happened a dozen times, every time because nobody answered between two runs.
What deliberately does not exist
No state sensor. This stove model does not know the status query; that only arrives with newer device firmware. So there is no state on demand, only confirmations of commands and messages the stove sends by itself.
No sensor called “burning”. The setting and the measured power are not
combined into a claim. One evening the setting stayed at 30 per cent throughout
while the plug showed 263 W, then 11 W, then 29 W. Which of those was ignition,
cycling or going out is something neither figure says on its own. That is why the
attribute is called regt_sich — “stirring” — and not “burning”. A sensor that
turns this into combustion claims more than was measured.
If you want to rebuild it
All of it is public, under an MIT licence:
| This project | fritzzetik/rika-serial-homeassistant — add-on, package and a description of the message format |
| The model for it | n-serrette/esphome_rika_gsm — same socket, but over ESPHome and a microcontroller |
| The pinout | forum post from 2013 |
| The old module’s manual | RIKA GSM Pikatronic — it documents the command language |
Everything is measured on a Como, built 2014. According to the manual the same socket and the same keypad menu exist on Memo, Pico, Revo and Topo — untested there, but the protocol belongs to the stove, not to the model.
One note about the model project, because it cost me a deduction: its pull
request 5 states that a different stove series needs no <LF> at the end of a
line. I had laboriously derived the same thing myself — it had been sitting there
all along. For the Como the variant is wrong, though; it wants both.
None of these links is paid. The price comparison needs a source and the parts should be identifiable — there is nothing more to it.
So what?
If you own a heating appliance that was supposed to be “smart” and no longer is, you know the pattern: the device is fine, only the connection is missing. That case is more common than a genuine fault, and it can usually be solved without replacing the device.
Three things I take away:
- Check the assumption you no longer see. I lost a day because “RS232” was in a product name.
- Build the tool after the third individual attempt. Twelve manual tries find less than one pass that compares eight variants.
- Do not ask why the device rejects you — ask what actually reaches it. The answer was in the log from the start.
Fitting anything to the socket itself is work for a qualified trade. What is written here documents my own approach; it is not an authorisation to intervene in anyone else’s installation.
Bruno noticed none of this. He is still lying in front of the stove. He does not care about the control system as long as the warmth is right — and now it is right on request.
If you want to follow this: use RSS
No newsletter. You give me no address, I keep no list, and nobody has to agree to anything to learn that an article is finished. RSS is the older and, for both sides, the more honest solution.
How it works, and why no newsletter
- 1Get a feed reader. No account needed with an app on your phone or a browser extension; use a hosted service if you prefer.
- 2Add the address above to it.
- 3Done. New articles turn up in your reader by themselves — unread stays unread, and nothing lands between invoices and ads in your inbox.
Why that is better: your reader fetches the file. I get no address and cannot see who reads or whether anyone opened it. Unsubscribing means deleting the entry — no link, no confirmation mail, no me.